Visual Effects Breakdown Part 2

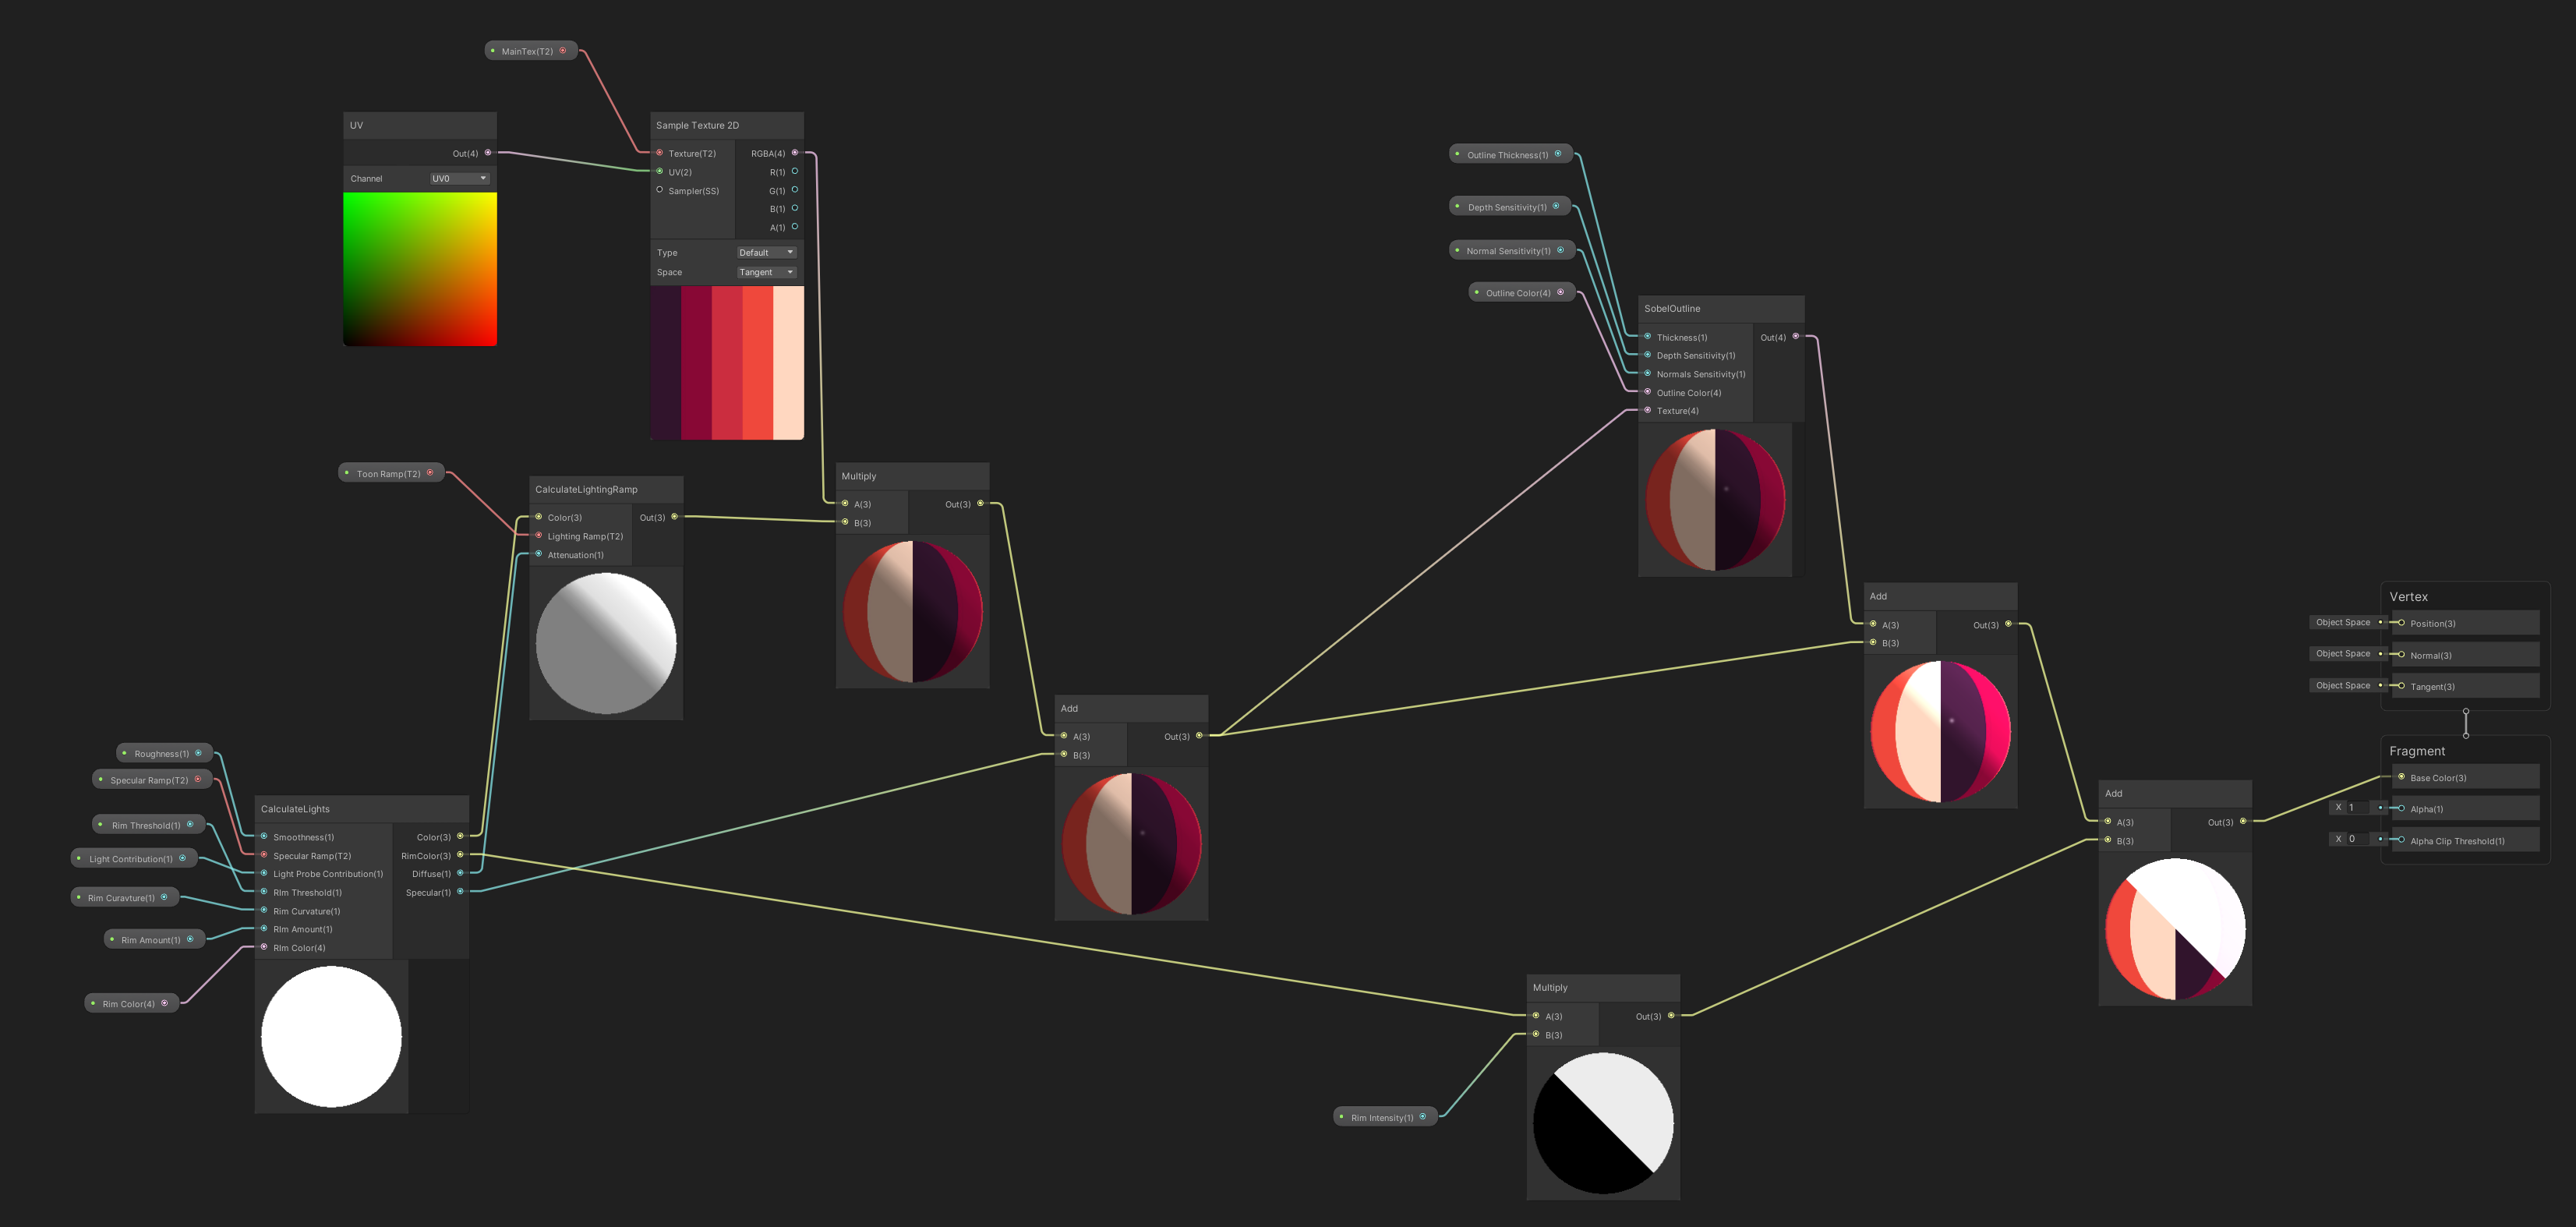
VFX Graph is a modular system much like shader graph, here the particle system is initialized. For our purposes we only want one particle to be spawned, Capacity doesn’t really matter in this case as we only want one particle this indicates to system how many particles this system can spawn at any one time.

There is nothing we have to update so we skip this stage and outputs to the master node, here we can tell the system to use the shader above to render the particle. 

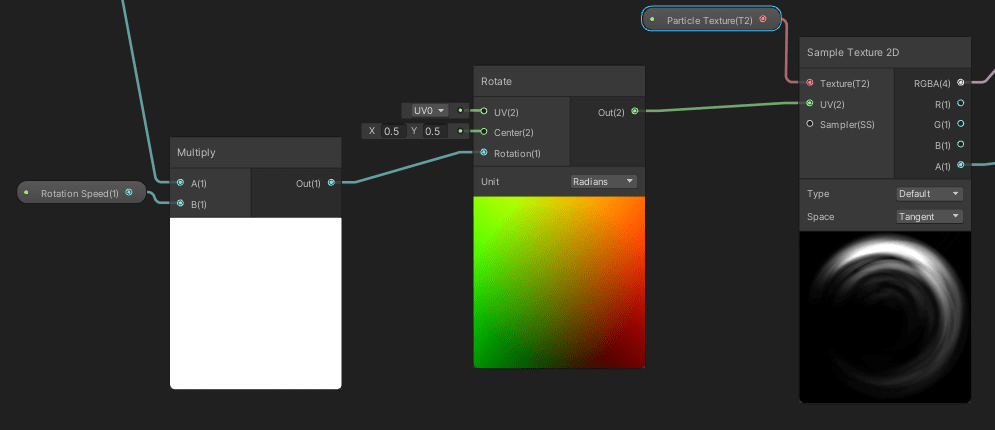
the orient node means that we can customize how the particle is positioned in front of the camera, the default settings means it will always face the camera regardless of where the camera is, in this case it is set to Advanced Mode in this mode it can be rotated it as desired in the scene. 

As this is an area of effect we want it to be parallel to the floor at all times, in the default mode it would be rendered at an angle as the camera is looking at the level on an angle which is not the correct look for this effect.

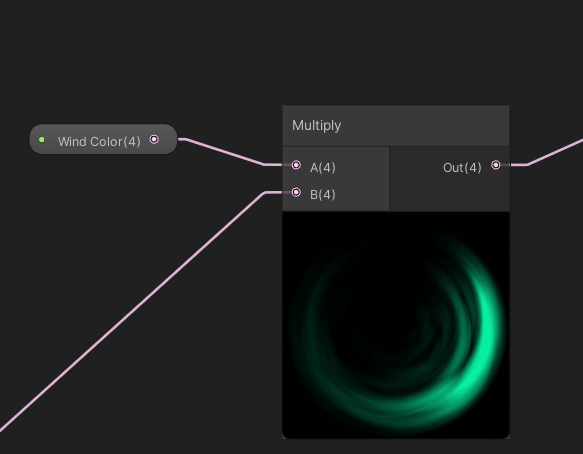
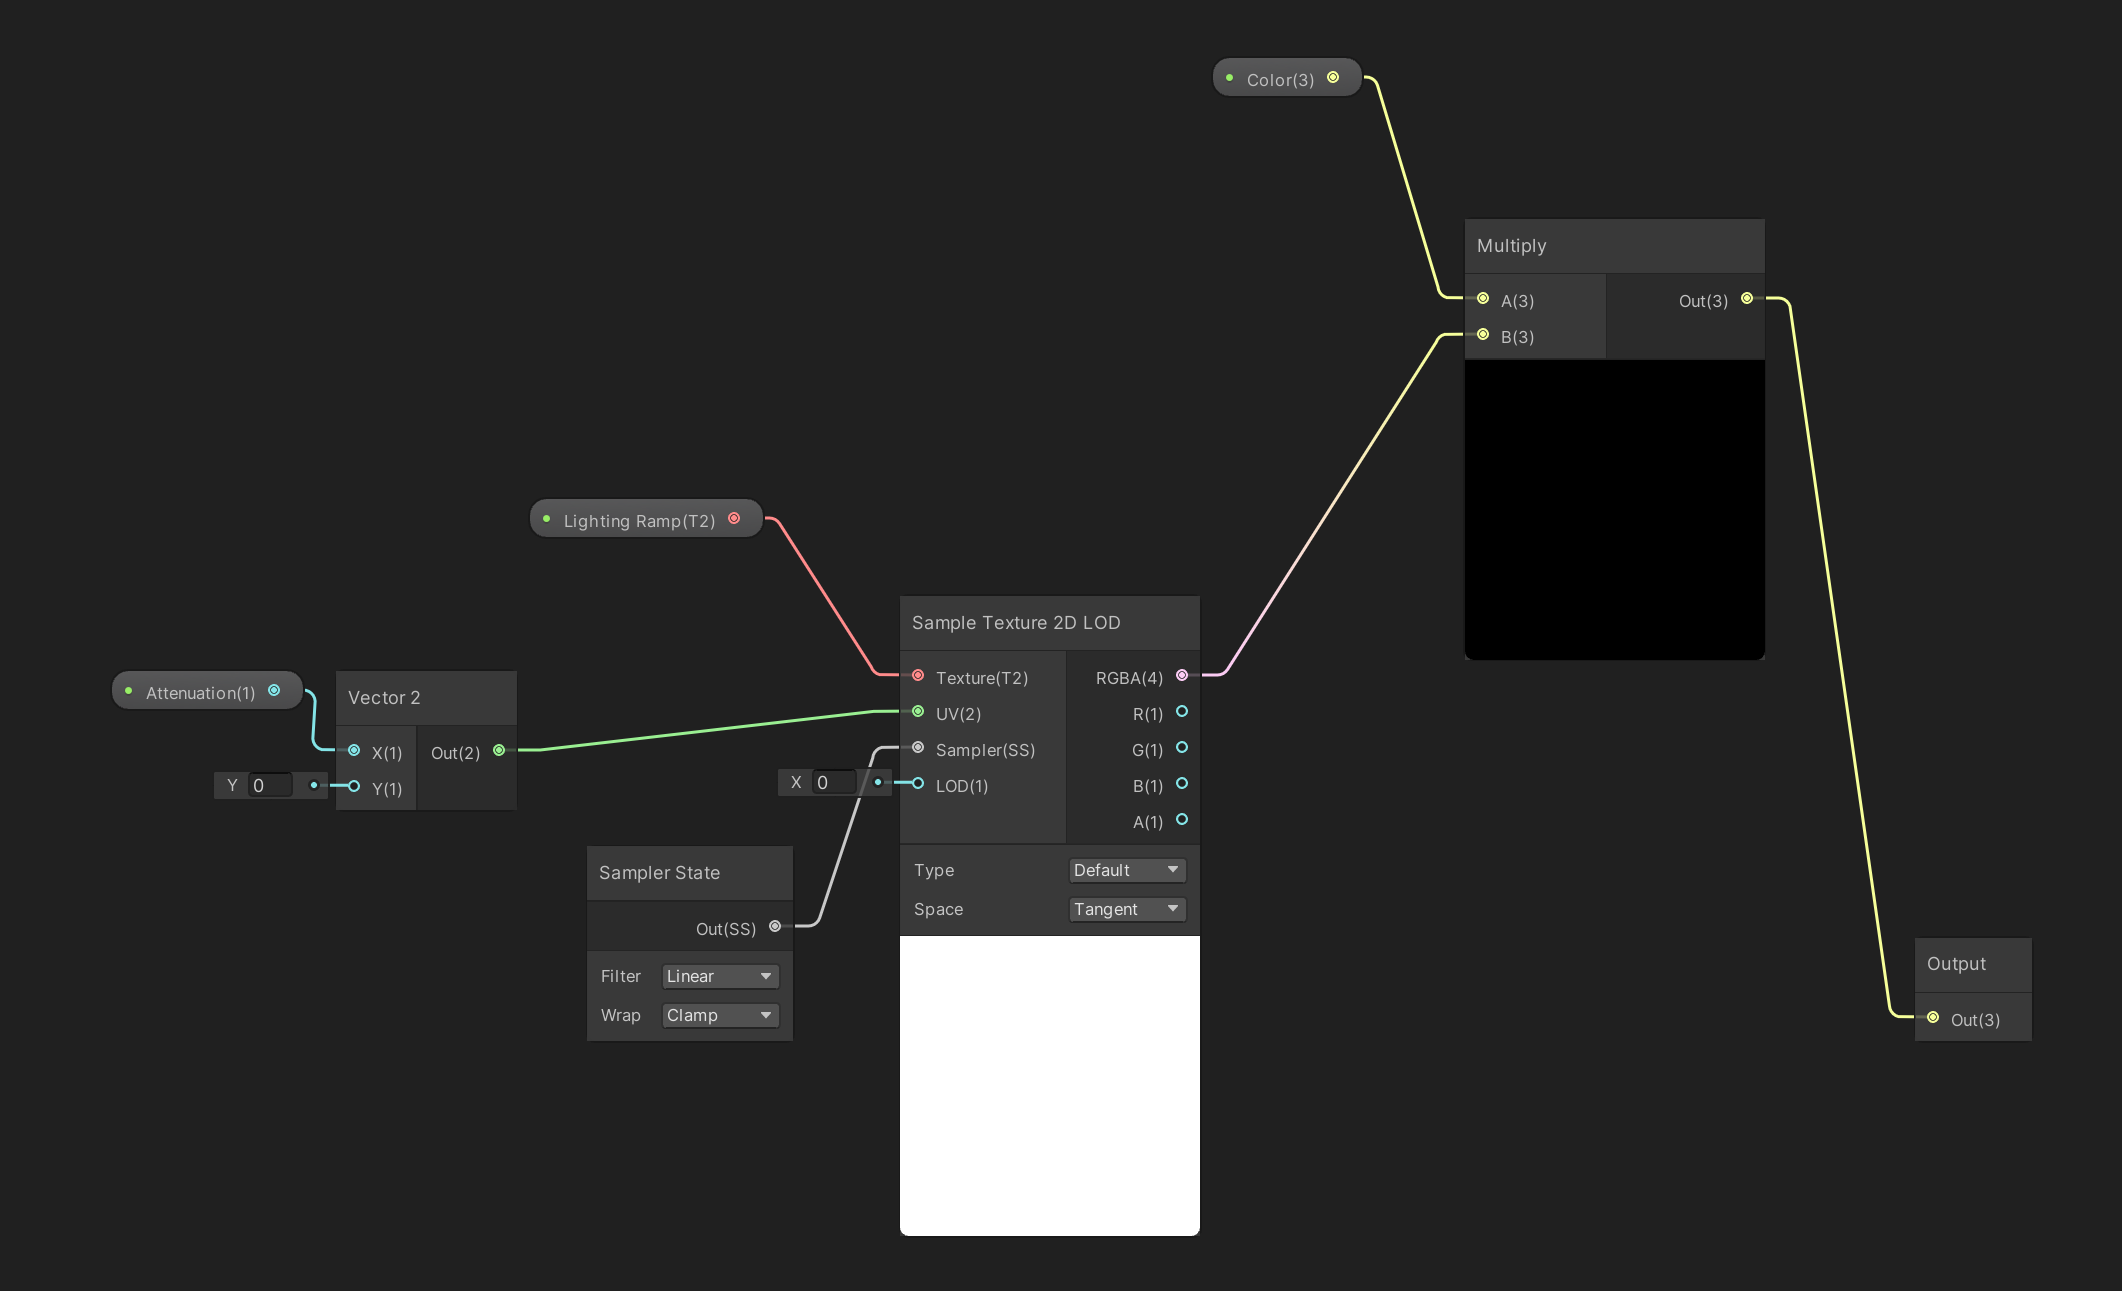
The Multiply Size over Life node, allows us to do a simple animation just by changing the animation curve this will effect the way the particle is spawned in and then faded out. In our case for the wind effect it is set to constant as i think this looks better for this effect. Color over Life is the change in color over the lifetime of the particle.

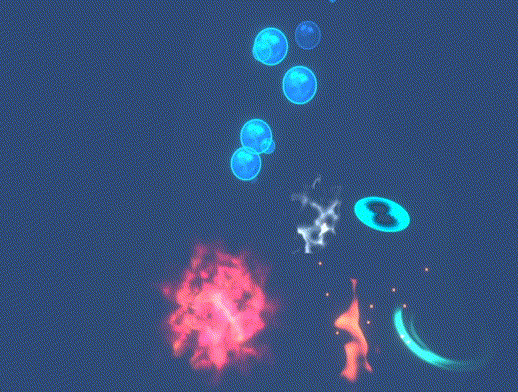
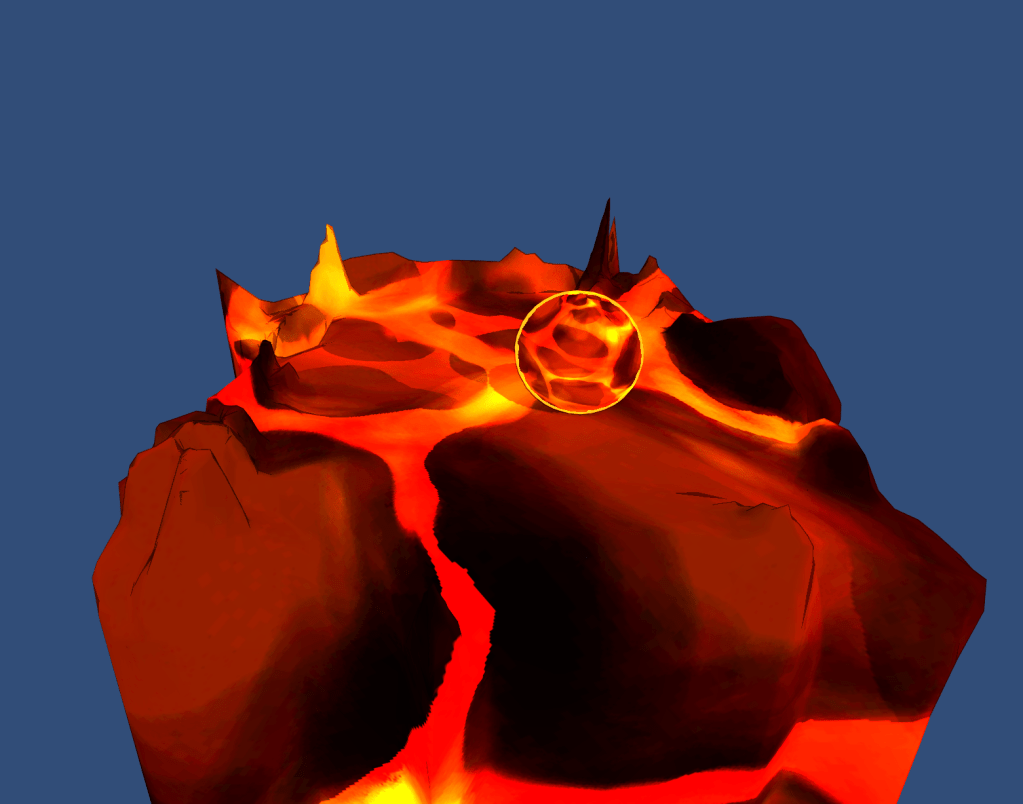
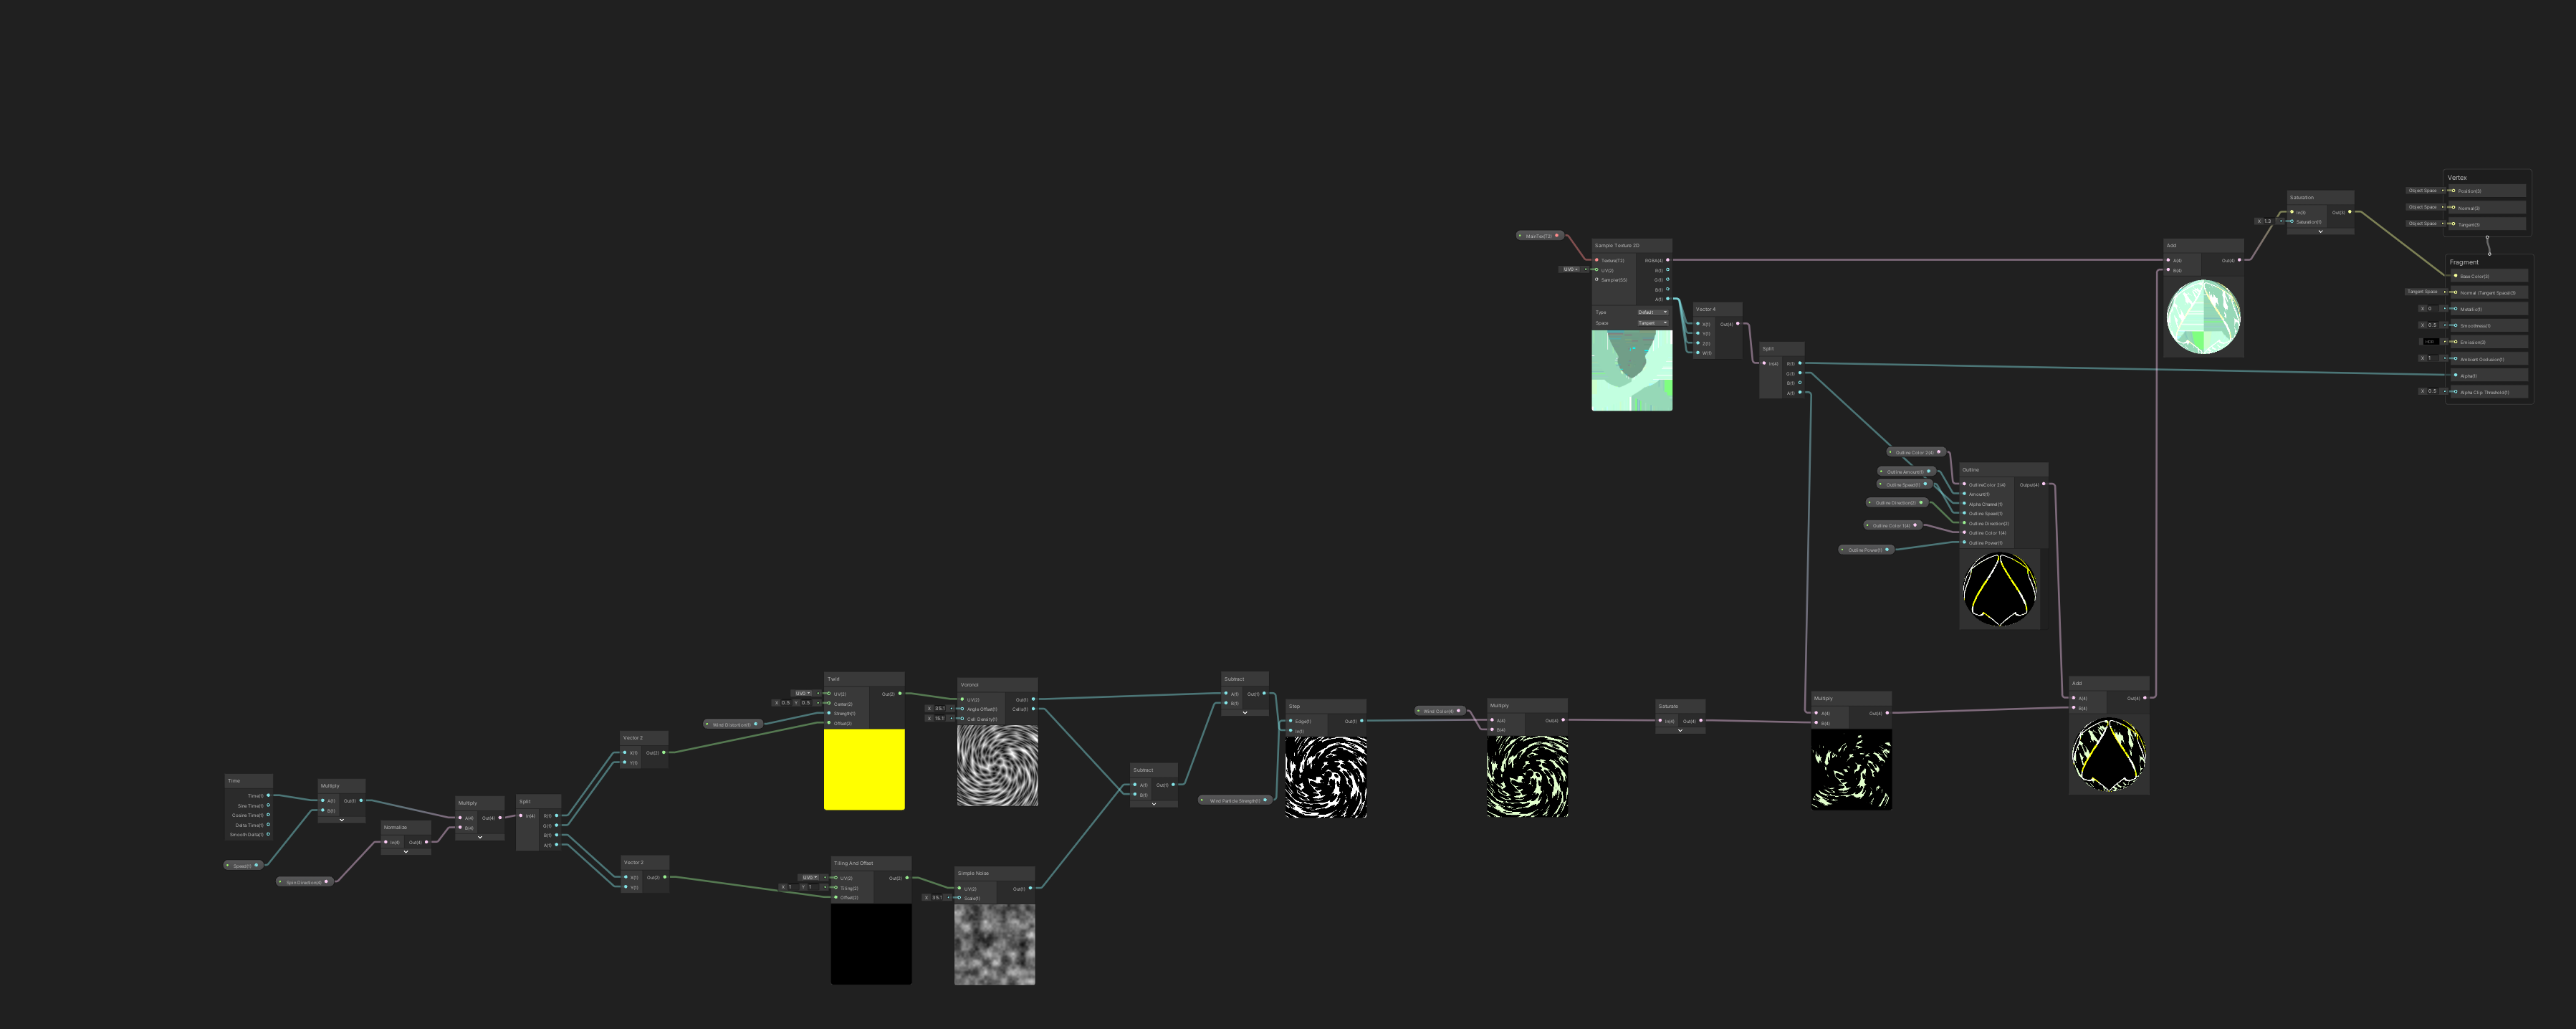
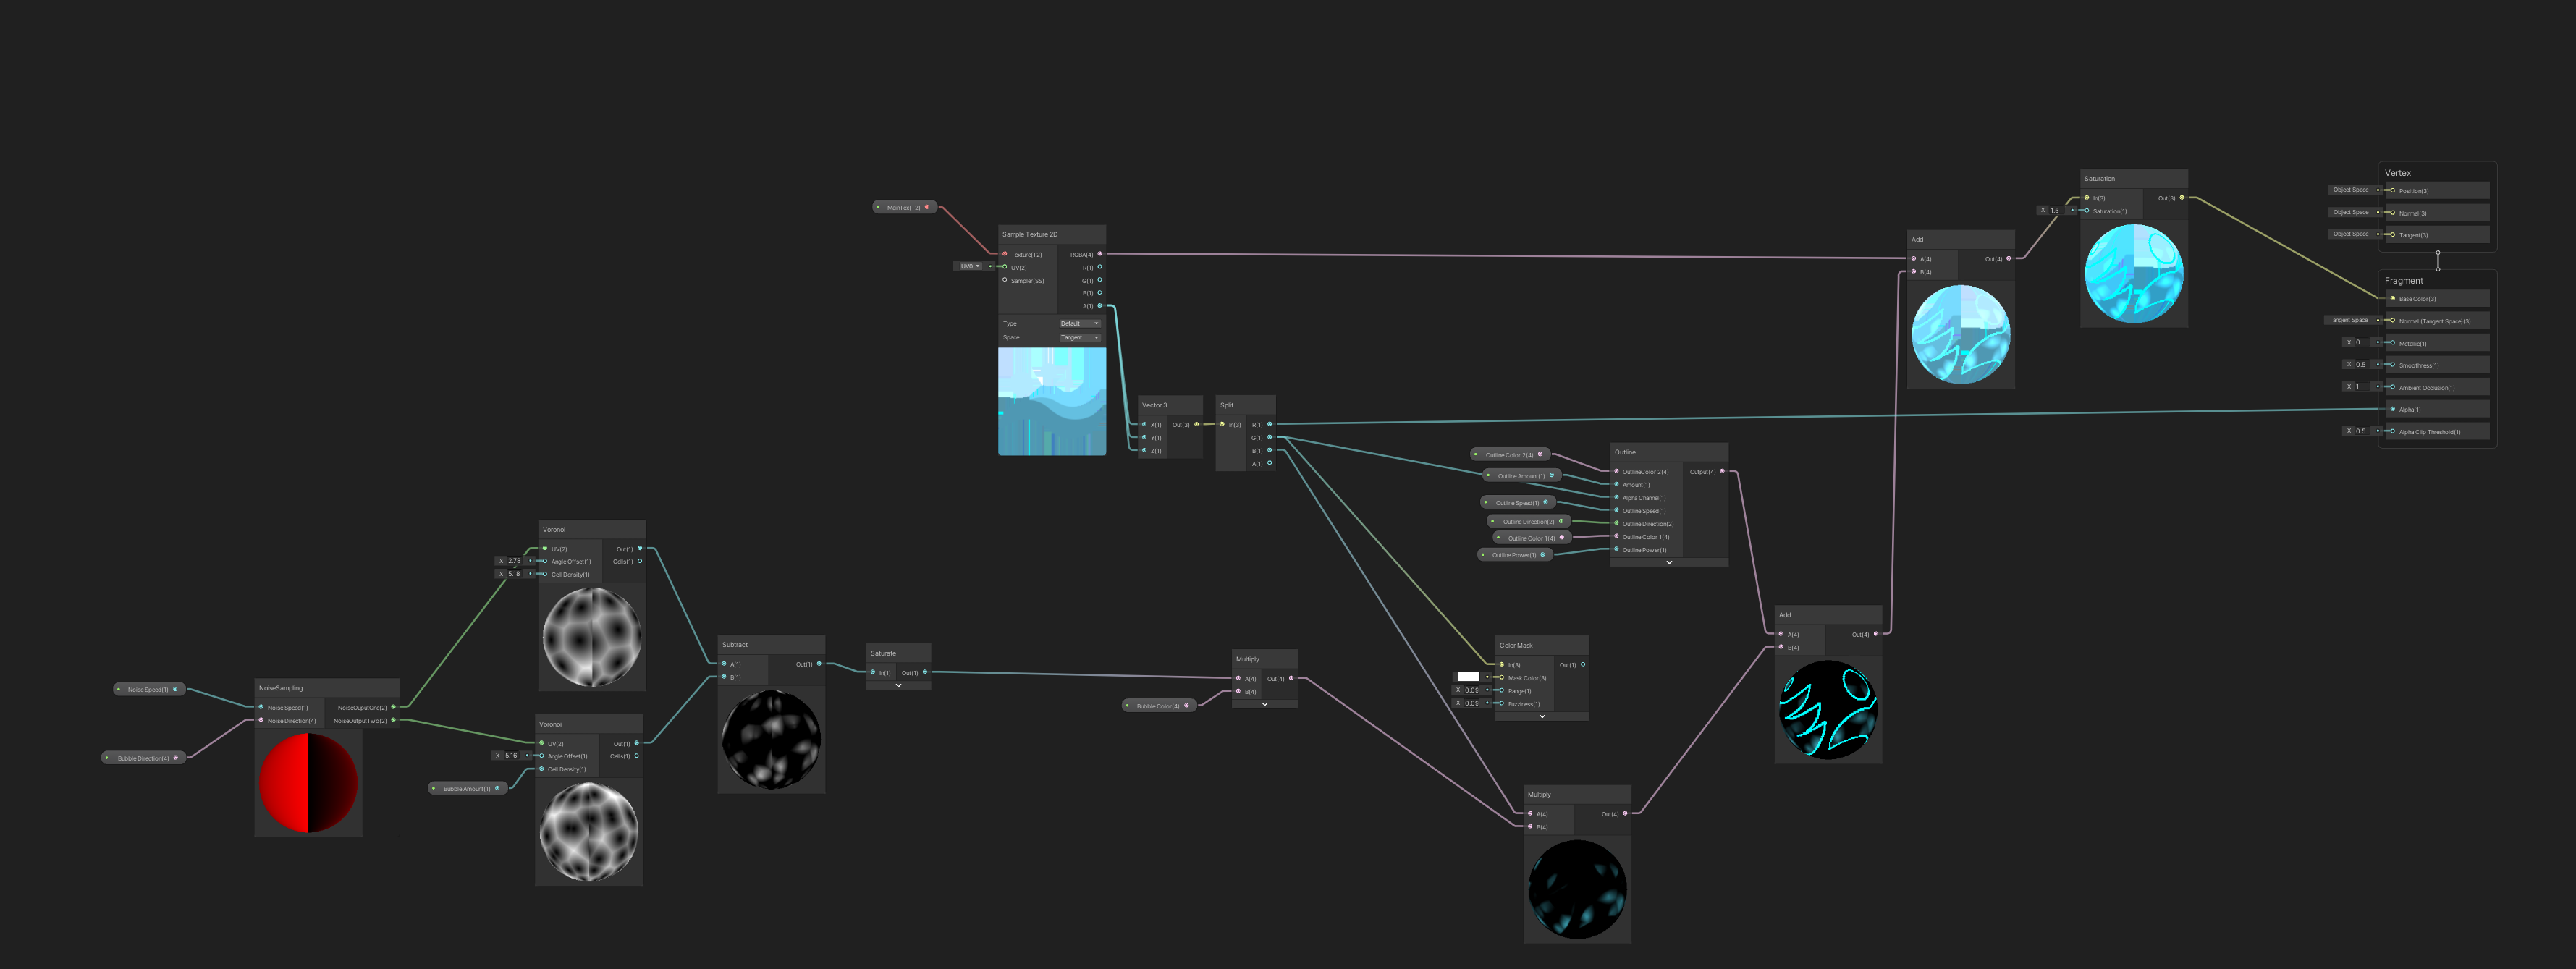
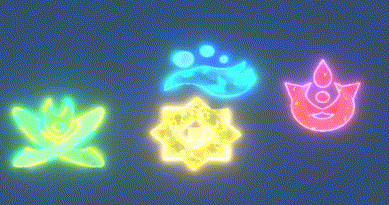
The results of are as seem in the image below, all the other shard effects are made in the same manner.

Visual Effect Breakdown Part 1

Ill discuss the Wind/Gust and effect as an examples of how all the shard visual effects in the game are made, there two components to these effects first is the shader and then the actual particle system itself.

the shader does two things, first it samples a twirling gradient noise over time using the Twirl node. Both the speed of the twirl effect and scale of noise can be adjusted.

the next thing is passing the result into a Power Node, to get the stylized wind effect as seem in the image below. then we multiply by a color.

the second half of the shader samples the rotating wind texture by passing it into the Rotate Node, multiplying the results by a color

Then adding the results from both parts together before passing it along with the texture alpha into the master node, one thing to note is that this graph is a VFX Graph Shader, but the logic is the same as making a regular shader. the only difference is that they are all unlit shaders VFX Graph does not take lit shaders.

Shard Abilities VFX

I’ve had a look at the VFX Graph to make particle effects for the game, as an exercise to up skill with the way VFX Graph works I have followed this tutorial, it covers a lot of the fundamentals. Especially how it can be integrated with Shader Graph to make more complex effects.

VFX Graph is quite simple once you get used to the interface which is actually more or less the same as Shader Graph. Originally i thought of using Shader Graph only for the games VFX, mainly because i thought that it might take too long to up skill in VFX Graph it also the reason I’ve put off learning VFX Graph.

 I have made some of the games VFX, may of these effects are combined with Shader Graph’s effects to generate the look we are aiming for, all the flame effects uses the same shader with different particle settings in VFX Graph. combining Shader Graph and VFX Graph together enhances the effects i am trying to make.

Research And Analysis

I have begun thinking about the visual effects for the shard abilities, i came up with a structure to which ill start making those as well, earlier i have been looking at cutting geometry with alpha transparency, i came up with this structure that will form the bases for any magic effect in our game, note that not all the components shown in diagram is necessary they are interchangeable and can be swapped out or omitted based on the effect we are trying to achieve. 

I made this structure out off looking at different in effects in other games. Any complex effects seen in games are made by adding multiple layers of simpler effects together.  

Take for instance the Hydra from Diablo 3 in the image below, the effect can be broken down into separate components, at the base of the Hydra is an swirling fire aura. this can be achieved by applying a circular mask to a scrolling texture or procedural noise blended with a color applied to a quad

The Hydra it self is a 3D mesh that sits on top of the quad underneath, it looks to be semi transparent this is most likely has a transparent effect applied to the mesh and then blended with a color, any embers that fly’s off the the hydra would be generated by a particle system. to finish off the whole effect bloom is applied to give the effect of glowing fire. 

Hydra
Diablo III © Blizzard Entertainment, Inc

the Specific implementation of the effects will differ depending on the engine that is used, but the underlying concept will be the same.

Status Effect Concepts

Using the structure above i have made some concepts for Poison and Burning Status effect. Since status effects are temporary, my current thoughts is having these effects applied to a transparent shape around the unit so it doesn’t interfere with the units actual effect. it also make removing then easier simply remove the effect around the unit

Lava Shader Breakdown

 I had a look at different styles of lava effects as research for our level, it has to fit with the toon style look that we are going for, i have made an attempt at doing lava though it didn’t turn out the way i thought it would. i had a look at this Tutorial in how they did stylized water. My original line of thinking was using this tutorial as base i could make lava instead of water it didn’t turn out right and there was some compatibility issues with the way the depth texture is calculated for the toon effect that didn’t work with this style of shader.

In the end i adapted a method i used before to make lava for a 2D game into this project, the basis of the 2D lava shader is using a slightly modified dissolve effect to generate the bright molten bits then apply it back on to the lava texture and scroll it over time in a certain direction to simulate lava flow. The modified dissolve effect is done by generating some noise then multiplying the result by the textures alpha to get the textures shape, subtracting that result by another noise sample with different offset values, multiplying the results by a color and then adding it back on the original texture to achieve the above results 

for this project the concept is the same but in 3D, there was a problem that needed to be solved. the default noise node provided by unity did not work correctly out of the box, there some some issues with using the default tiling and offset node which resulted in the texture stretching along the Z-axis.

The Tiling and Offset node provided default by unity has the UV input as a vector2. This does not account for the Z-axis as the texture is now stretched across any faces of the geometry that are not facing the camera. To fix this problem i had to create a custom node to replace the default tiling and offset node. Reading this Article about UV Based nodes in unity i made a custom Scale & Offset node that takes in the UV coordinates as a vector 3.

The final results can be seem in the above image, there were some issues that need to be solved before the transition from the original 2D lava to 3D can happen. In the process of developing this shader I’ve also explored Triplanar Texture Mapping and 3D noise generation as possible solutions. 

Triplanar Mapping is quite a complex topic the gist of it is to solve texture stretching issues over complex geometry. here is an Article that explains it in more detail.

Using the custom Scale & Offset node with unity’s noise texture works pretty well. it means i can reduce the complexity of generating 3D noise and use unity’s instead.

Fixed up a small bug that prevented the second layer from moving, the speed and direction input into the node that generates the second layer was flipped so it was receiving incorrect values, both layers now move independently with the bottom layer slower than the top for a better look.

Environmental Shaders Part 3

the main graph combines all the sub graph together to complete the effect, the final touch i added to this effect is the outline shader. that uses another custom node to run a sobel algorithm sampling the camera depth texture and normal, but instead of applying it as a post processing effect its applied as a per object effect. The reason is because Shard Master is a 2.5D game. Where the Creatures are sprites and they already have outlines baked in to the texture it self. we only wanted the 3D objects in the environment to have the outline.

the outline is generated by running the sobel algorithm attached to the custom node, then lerping the results with the original texture and a color to achieve the final effect. The sobel function is adapted from unity’s devlog.

the results are as seem above, the outline works fine for the most part, there some artifact issues in this current implementation of the outline shader, it appears to work better on rounded surfaces than the complex mesh of the level this issues becomes apparent when the camera is at certain angles and zoom levels, for Shard Master it is not much of a problem since the camera is fixed in the scene. I will do more research for a solution to this problem when i have more time.

References:

Environmental Shaders Part 2

Another major component of the toon shader is the Light Ramp node that is is used to calculate the shading over objects in the scene.

the node samples a gradient texture to determine the shading, for Shard Masters i used the gradients below, it doesn’t have to be these gradients specifically it can be any depending on the games aesthetics.

the toon shader also can receive multiple light sources this another custom function node that runs HLSL code to calculate the additional light sources before passing it into another sub graph to bring it all together to form the effect.

here the additional light calculations and the shading is then combined along with any additional global illumination values. the results are added to the main light node and passed out to the main toon graph

Environmental Shaders Part 1

there are a some environmental shaders that are used in Shard Master, the level that was shown in first post has shaders for lava and the toon shader for the level it self. This post will explain how they were made.

so the starting node here is a custom function that run HLSL code to retrieve lighting information from the scene, currently there is no built-in node that does this, but Unity does provide a custom function node that can run HLSL code. The custom lighting function is based on this article provided by unity, it goes over different types lighting techniques and how to use them with the custom function node in shader graph.

this graph uses a custom light node to get the direction, color, distance attenuation, shadow attenuation and world position of the object. The direction of the light i used in a dot product with the normal vector to get the diffuse base lighting, using the saturate node to clamp the results between 0 and 1.

the values from the dot product is then used into the calculation of the frensel effect in the power node that controls the threshold. Passing the results into a smoothstep for more control over the effect this is the rim lighting part of the shader.

The other two properties of the main light node, the results of DistanceAtten and ShadowAtten is multiplied with the dot product and passed as an output for shadow calculation at a later stage.

the normalized results of the light direction and view direction is used in the dot product calculation with the normal vector the results is passed into a smoothness node for more control over effect, This will grow and shrink the specular highlight as desired depending on the need

the specular light is multiplied with the shadow calculation, the diffuse main light color is passed out directly unmodified.

Shader Breakdown Part 2

The rest of the shaders for the creatures are very similar to each other with some differences in their noise patterns and how they are applied in the main graph. below are the graphs for Buried, Apex, Nautical.

The thing to note here is Apex does not use the custom noise sampling node, the reason for that is the first noise sample is passed into a Twirl node, that generates a swirl effect.

The final results for all four elements in the game is as seen below.

Shader Breakdown Part 1

The first sets of effects to be made are the shaders for all the creatures, in this game there are four elements that represents fire, earth, wind and water, in our game we call it infernal, buried, apex and nautical. It took about three weeks to design and produce them.

below this main part of the shader for the ‘infernal’ element, the starting node is a custom noise sampling sub graph that i made for when i needed to sample two noise samples. Then taking the difference from the two samples then passing the results into a smoothstep with a parameter to control the amount before multiplying the whole thing with a color.

below is the noise sampling sub graph, i made this graph to speed up development time as the shaders for the other three elements in the game is very similar in structure. the reason why it takes in a vector 4 for direction is because in this node it gets split into two vector 2 components.

The directions gets normalized and multiplied by the speed and time before pass it into a tiling and offset node. there is only one value of speed for both that is because these particular effects do not need varying speed between the two noise sample for the final effect i was going for.

back in the main graph the the main sprite texture is sampled and then added with the results of outline sub graph.

the outline graph takes in the alpha of texture along with two colors and amount parameter, speed and power. the results are added with the noise from above passing it into the master node. see below for outline sub graph.

here using a gradient noise scrolling over time it is passed into two color mask nodes to generate the an opposite pattern. this part of graph could be optimized by replacing one of those nodes with a one minus node. to get an inverse of the noise before applying colors and adding them together. the noise is multiplied with the alpha from the sprite texture that gets passed in, the alpha is controlled by a step node. Here it is also passed into a power node to increase the opaque areas of the alpha before subtracting it with the original. the results are clamped and them multiplied an amount value before combined with the noise results.